When you are quilting for others, you get a wide range of input ranging from “just do what you want” to “I have this very specific thing I want quilted and don’t want it to vary from my idea even just a little bit.” Between these two extremes, lies my favorite kind of quilting: Collaborative Quilting. I love it when clients come with some idea of what they want, but are open to me putting my spin on it. That’s why I was super excited when one of my clients brought me a pieced top that was primarily negative space, with just a random mini charm square here and there. She had this great idea that she wanted me to execute. She had also made a bird to applique for the top, and she wanted it to be in a quilted cage that I got to design and quilt for her. In Portland style, we were going to collaborate to “Put a Bird on It!”
(Now if you aren’t familiar with the sketch comedy show Portlandia, you might not get as excited as I did by this prospect. But having grown up near Portland, and having lived in the city for many years myself, I just love that show, and one of my favorite bits is about these designers who like to put birds on things to make them suddenly super cool (click here to watch.) I was so excited to get going on this project!)
The first thing I needed to do was design a bird cage and get my client’s approval to move forward with my idea. I took some craft paper and her applique bird and started sketching it out.

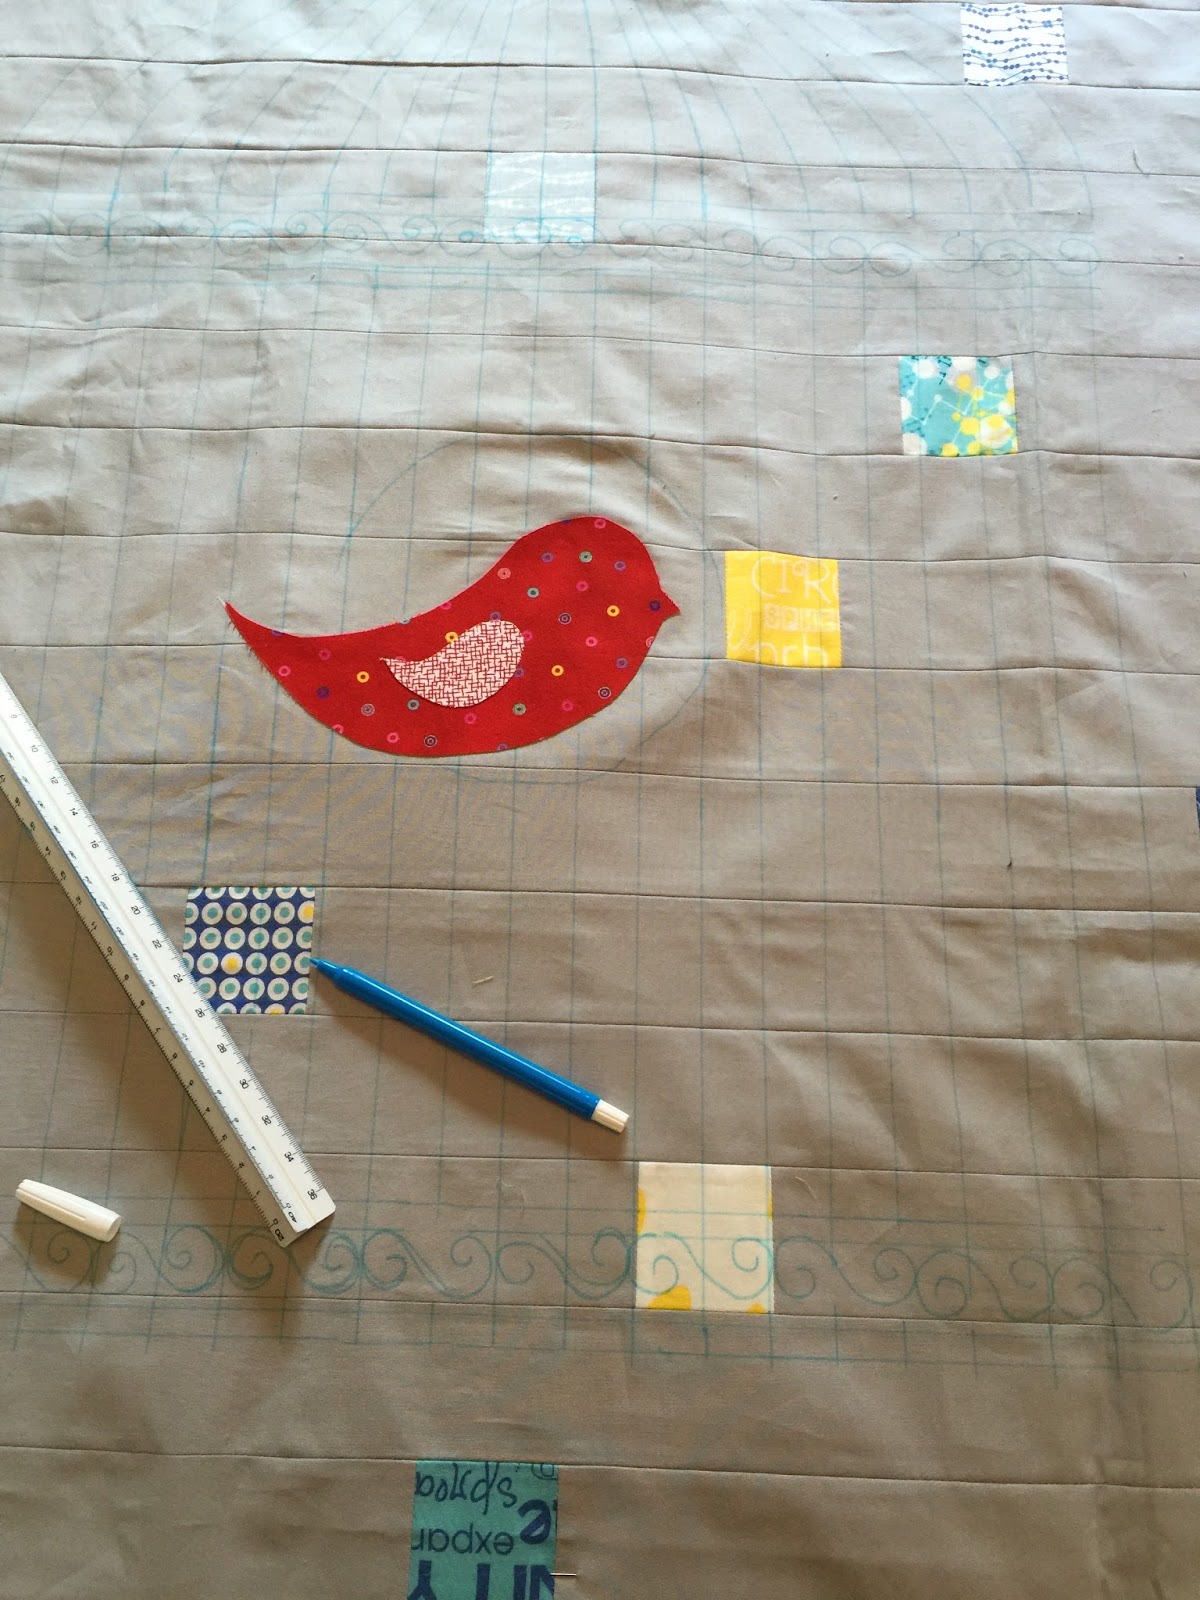
Once I had the go ahead that the design was approved, it was time to mark the quilt top. I try not to do too much marking on tops, because of the scary thought that the marks might reappear after removed – but I tested my blue water soluble marker on a part of the top that would end up in the binding, and everything looked good. So it was time to make some marks!
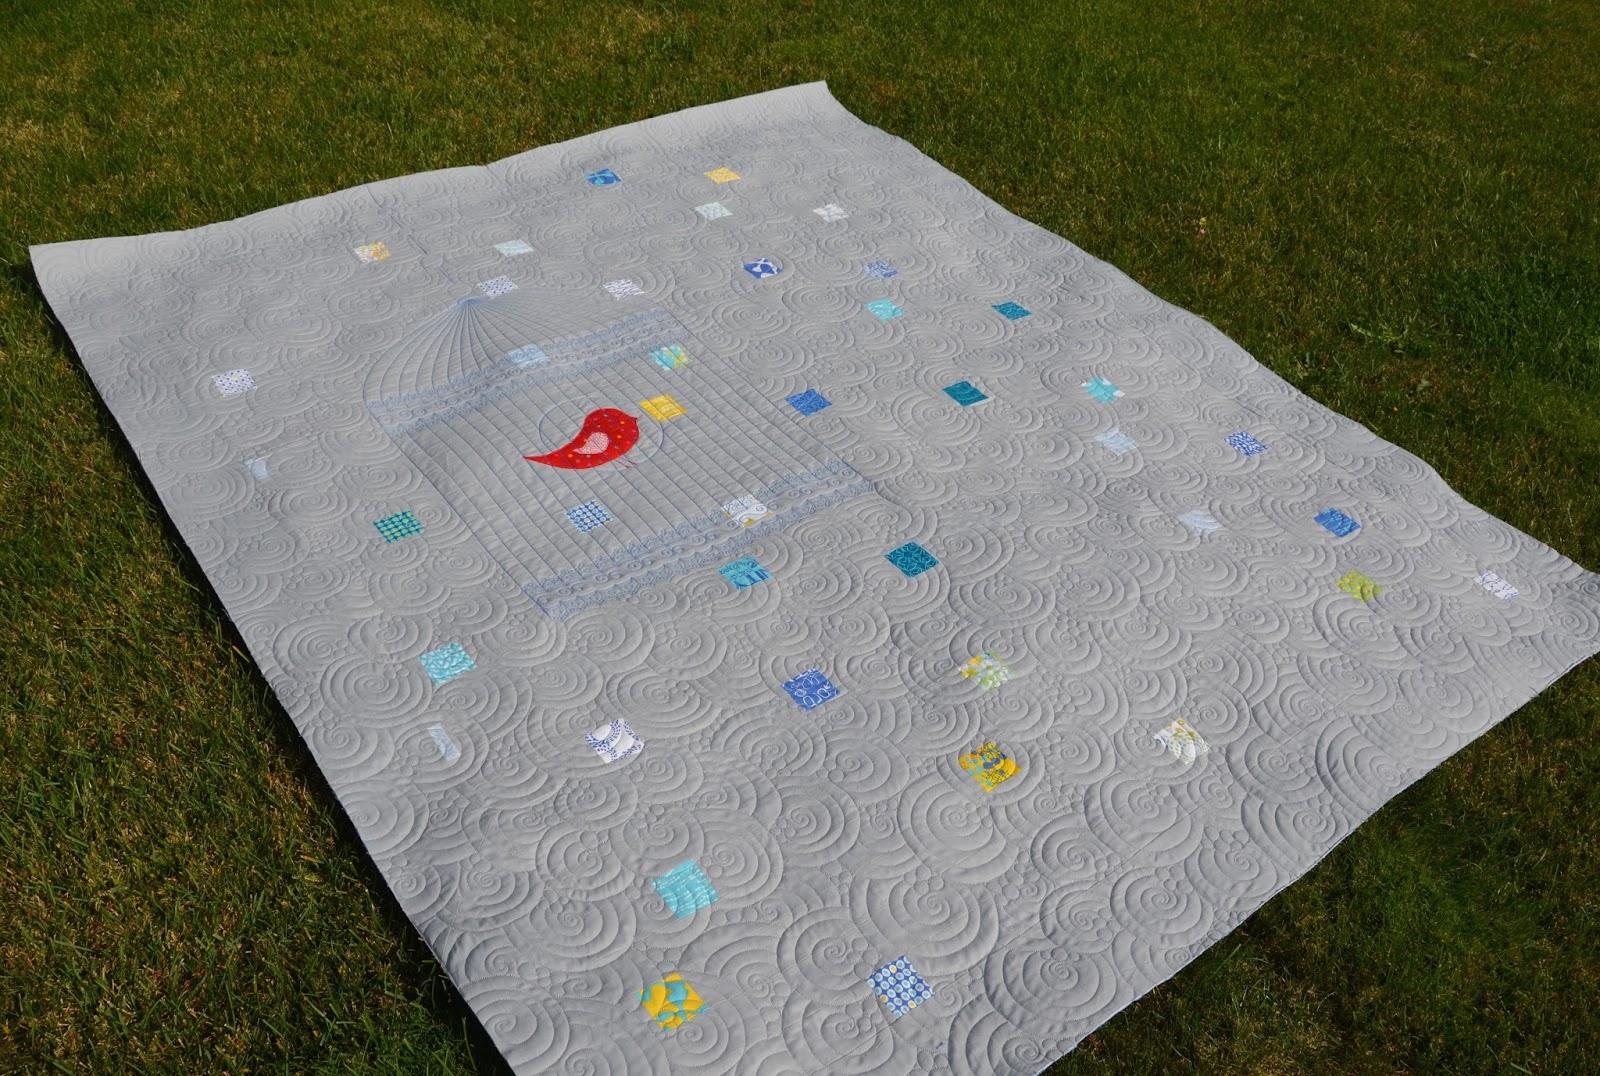
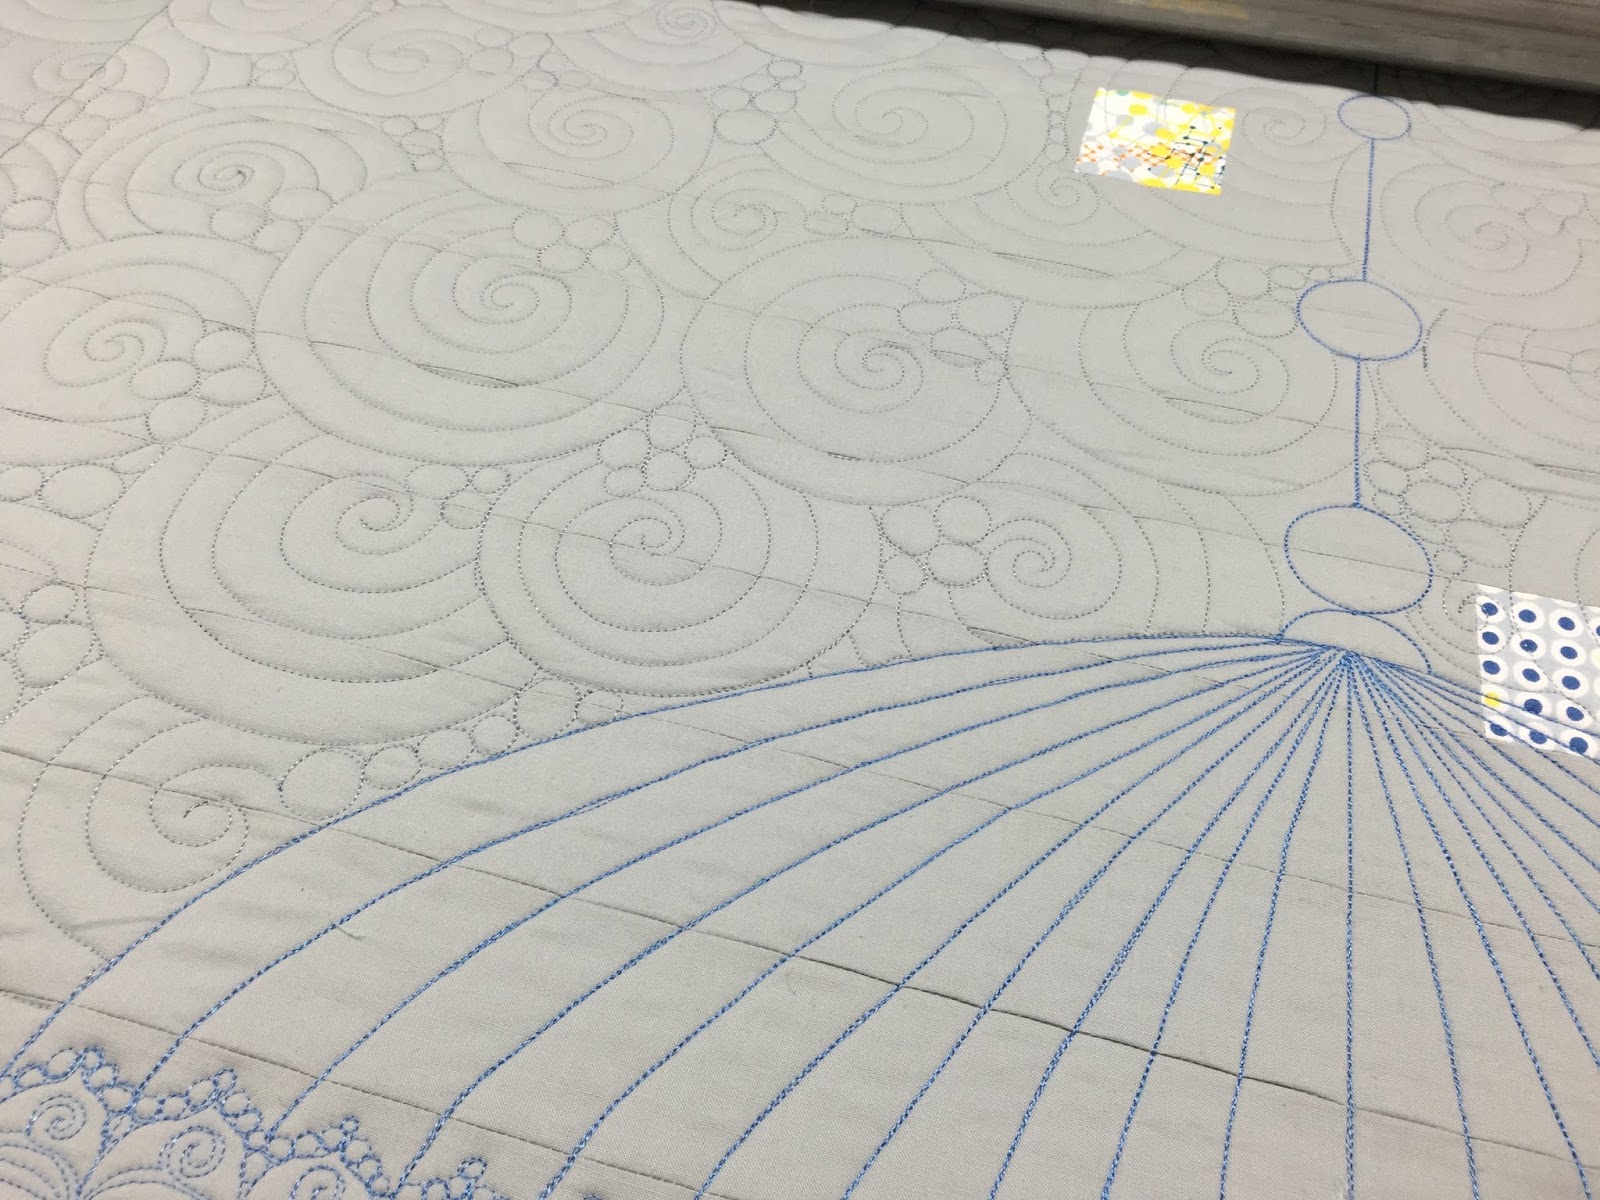
Once I had it all marked out (courtesy of my new wafer thin light box), it was time to load it on the frame and get to quilting it! Although the bird cage was the focal point, we wanted a nice background motif to fill up all that negative space. After much discussion and trying some different options, we decided to go with a swirls with pebbles motif.

At this point, I like to send little sneak peak photos to my clients just to let them know that progress is happening!
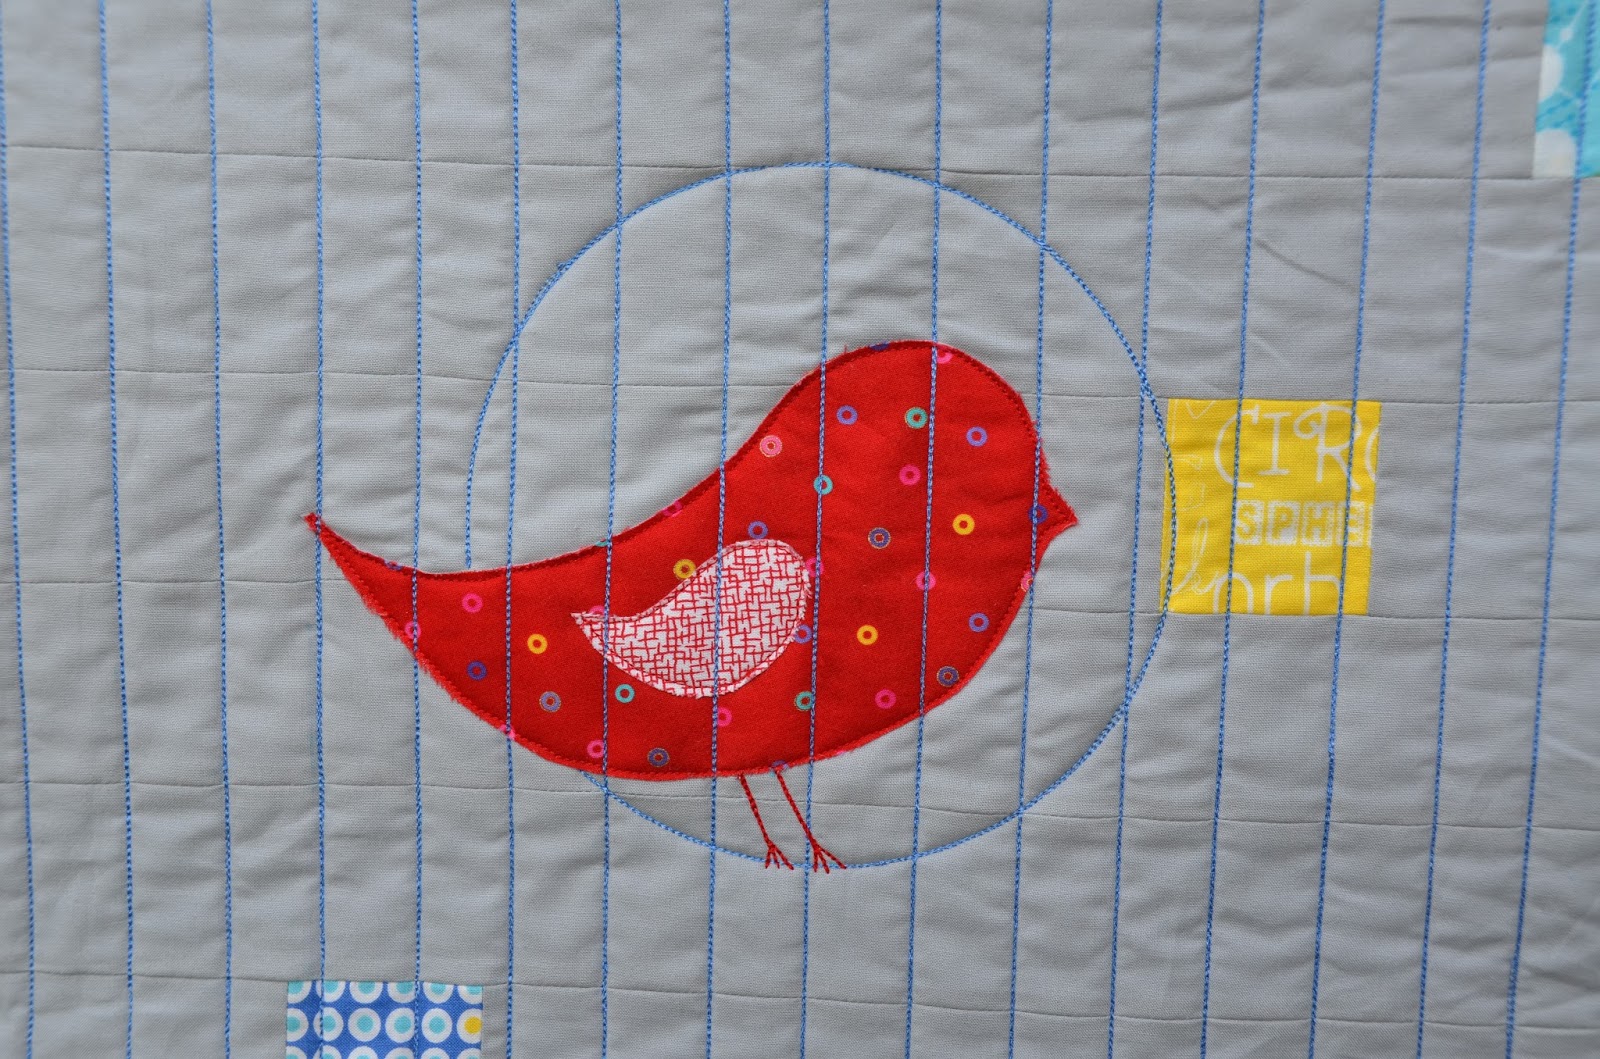
I used my longarm to attach the bird applique where I wanted it, and then quilted in the cage and perch. I even quilted in his little birdie feet.
In order to make the wires of the cage stand out, I quilted those lines several times to build up the thread. I used Glide thread on this project, which has this great shiny sheen to it. If you are interested in how long it took me to quilt the bird cage, I don’t know for sure because I didn’t keep track. I did test out my new camera mount while quilting the details so you can see that quilting like this takes some time:
I tried some new techniques I learned from classes I took with Claudia Pfeil. I really love how the decorative features on the birdcage turned out.

Here is a picture of the whole cage, bird and all.
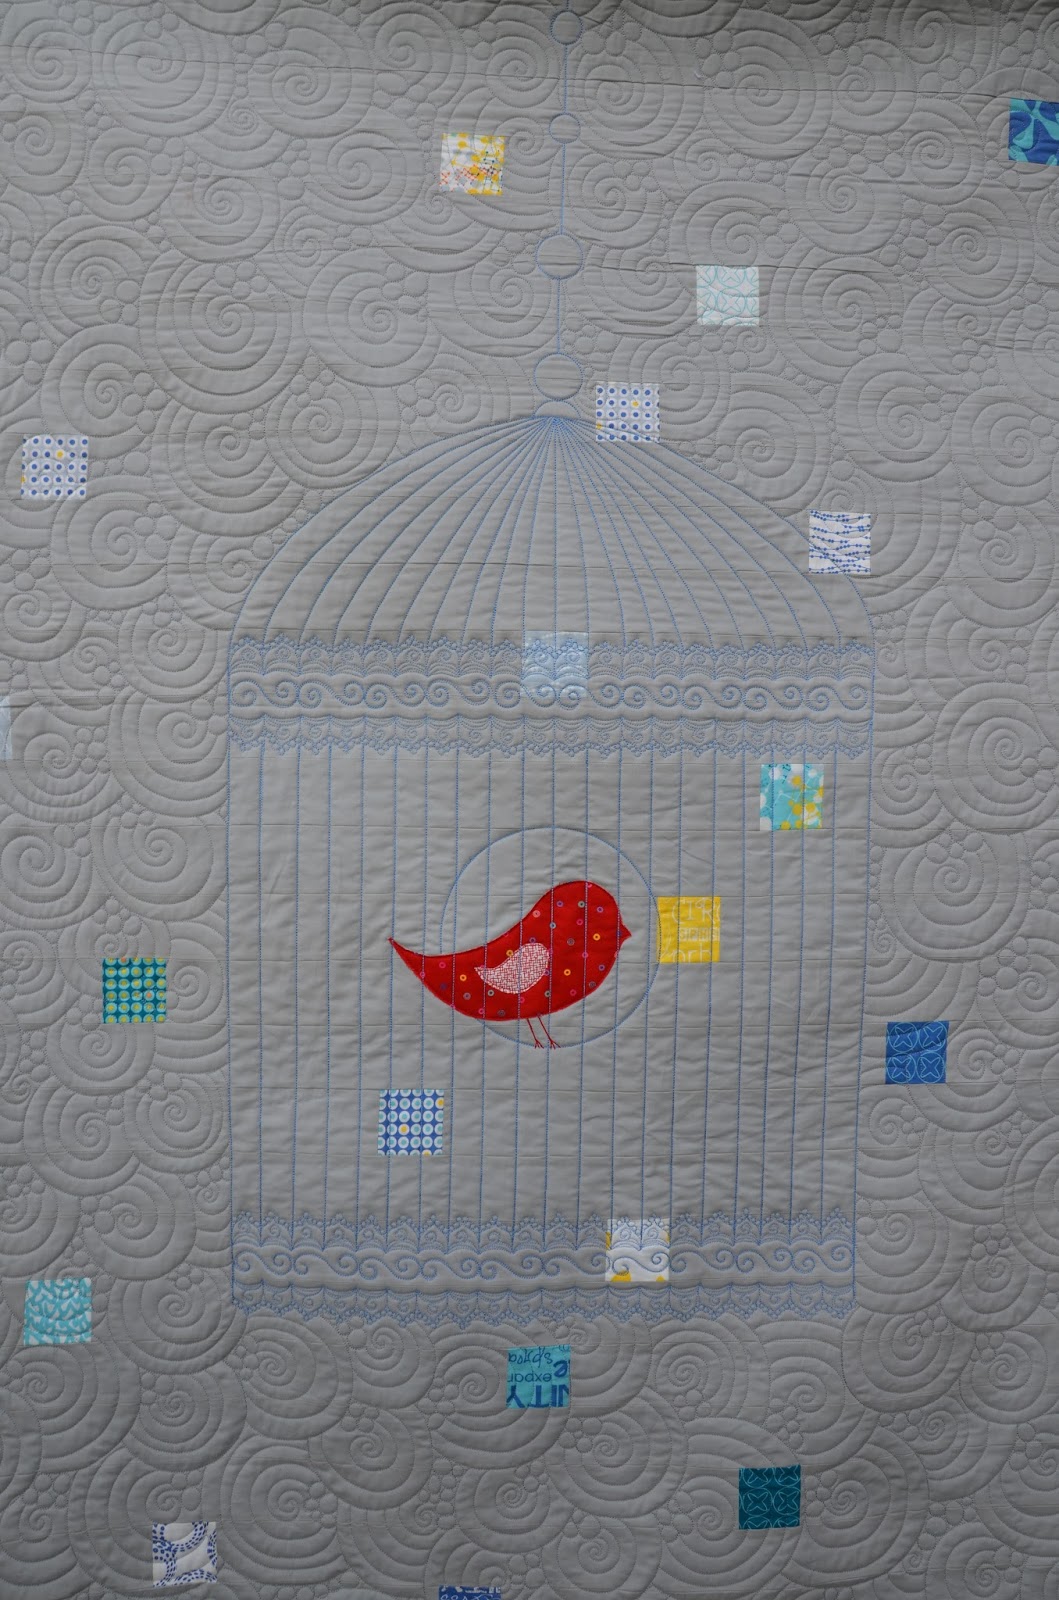
I just love how the quilt turned out.

I look forward to more collaborative projects in the future. They are so much fun!
I’d love to hear what you think, so please feel free to comment below.
Note: I am not currently crediting my client in this post at their request, because this project is a surprise gift. After it has been gifted, I’ll come back and edit to include my client’s name.

Awesome detail on the quilt…love the cage, love the swirls and circles!
LikeLike
Beautiful.
LikeLike
Great collaborative quilting! I Yes, it's the perfect balance as you describe. The quilting is wonderful!
LikeLike
Beautiful. I love the collaboration and design. The creativity is inspiring.
LikeLike
Truly inspirational! I think I am the person they “put a bird on it” for. Anything with a bird grabs my attention for sure. But you elevated it to another level with that cage!
LikeLike