This one is just for me. I’ve been curating these fabrics for about 5 years now. I wasn’t sure how I was going to use them and in what project they would become something…but I kept collecting little bits of fabric that spoke to me on a personal level. How many of you do that too?

There are several fabrics with thistles, strawberries, apples, plaids, florals and little novelty prints that reflect something about me in some way. I tried to piece things randomly, but as always there seemed to be some fabrics that ended up too close together. I had to let that go though during the process though, reminding myself that no one would notice those types of things but myself – and I actually wanted to finish this project and not just keep fixing “issues.” But I’m getting ahead of myself….because this quilt became what it was through a process. I had no idea it would look like this when finished when I started pulling fabrics!
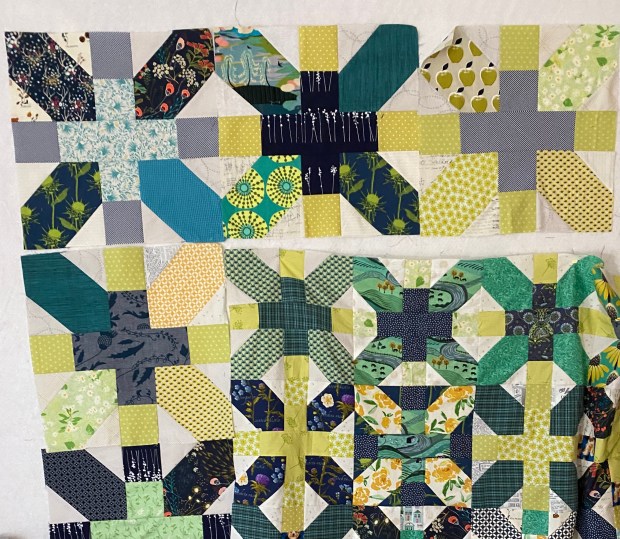
This quilt became what it was because of my design wall. I can’t tell you how important this tool is to my process. I’ve tried laying things out on tables and floors, but to be able to put the blocks up on the wall and take a photo just seems to be what I need to really see things well.
Once I had pulled all of the fabrics from my stash that I thought would play nicely together, I started making a bunch of blocks. Here is a photo I took of my design wall as I was sewing the blocks together. I constructed 36 blocks and placed them on the wall as I finished them. Seeing them up on the wall really made me fall in love with it, and I that is when I realized that this one should ultimately become a King Sized beast for my bedroom. Since the blocks I had constructed so far measured nicely for a lap quilt, I was faced with making some decisions. Keep it all the same throughout by not changing it up and just making more blocks, or change it up?

So……off to the internet I went to look for ways to add borders. What I discovered was that there are several versions of this block out there in different sizes! Why not add a row of larger scaled X and Plus blocks?! Things started moving more quickly with bigger blocks, and before I knew it I had jumped from a lap sized quilt to a queen sized quilt….almost there!
Now I will be honest with you. I was at a creative roadblock at this time. I just couldn’t visualize how I was going to add another border of less than 6 inches and have it play well with what I had so far created. I also was committed to only using fabric from my stash, and I didn’t have enough yardage of anything that would work as it’s own border…..and I also thought that would be a big shift from the randomness that I had been playing with so far. So I decided that I was going to add a plain low volume border around the outside that I could integrate with my quilting motif. To solve the issue of not enough yardage, I just used different low volumes for each side of the quilt!
And with that decision, I was ready to load it on the longarm and start planning for how I was going to quilt this beast.

See the chalk markings? I really wasn’t sure what way to go at this point either. So I decided focus on that low volume border, and how to tie it in with the overall design.

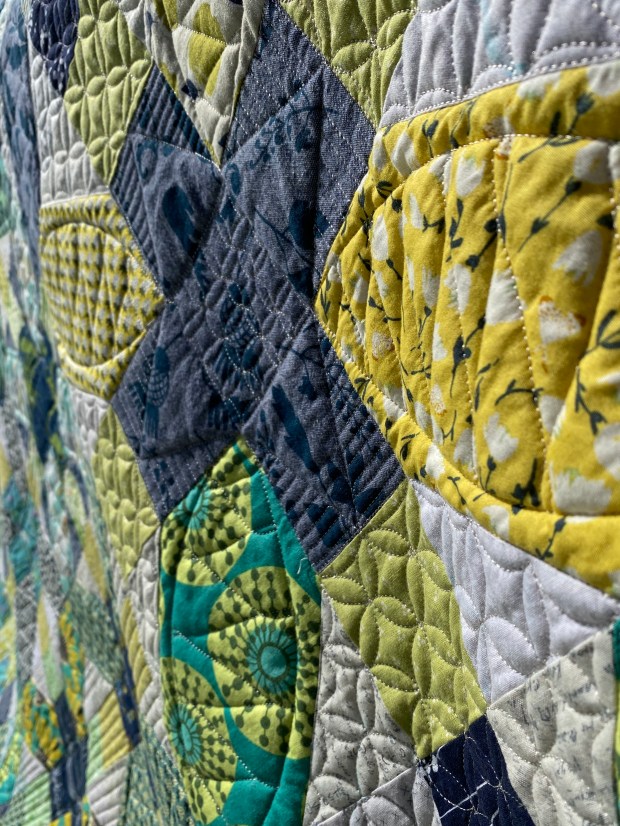
Once I committed, it all seemed to come together. I used a lot of blue marker to draw in the negative space block design. (It removed from some fabrics better than others – meaning I needed to do a lot more removal effort for some of the fabrics – so be sure and check that before quilting!). I decided to quilt petals into the large “X” parts of the block with a wishbone free-motion design inside. Once I decided to do that, an orange peel filler seemed to be just the thing for the larger x and plus blocks.

For the smaller blocks in the middle of the quilt, I simplified the quilting design so that it would go quicker and I would have less markings to make/remove. I still kept some continuous line and wishbone in the design so that it all played nicely together.


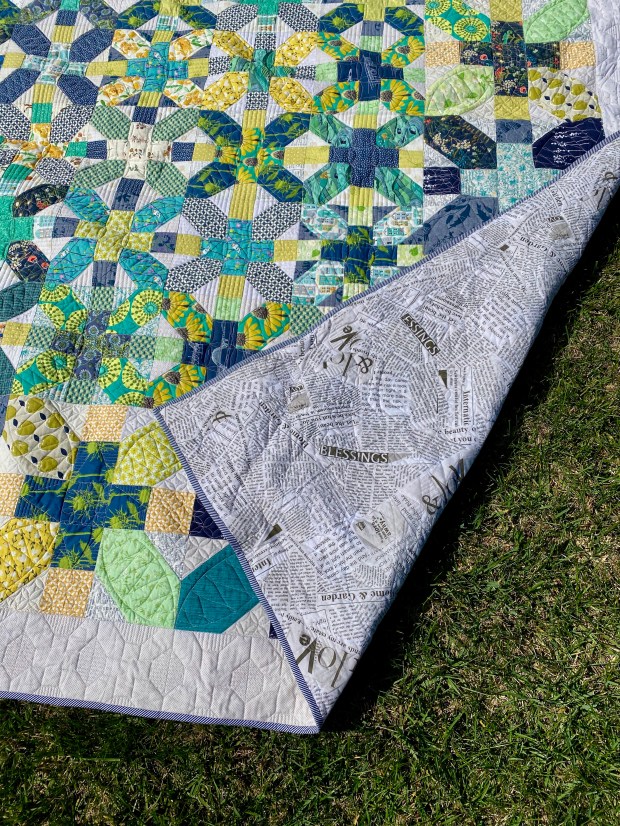
For the back, I had a nice large wide back of news print that finished it up well, and a stripy navy binding sealed the job.
My X and Plus Quilt – Started late December 2019, and finished in March 2020. 100% cotton woven fabric, Single Layer Hobbs Wool/Cotton Batting, Glide Thread.


