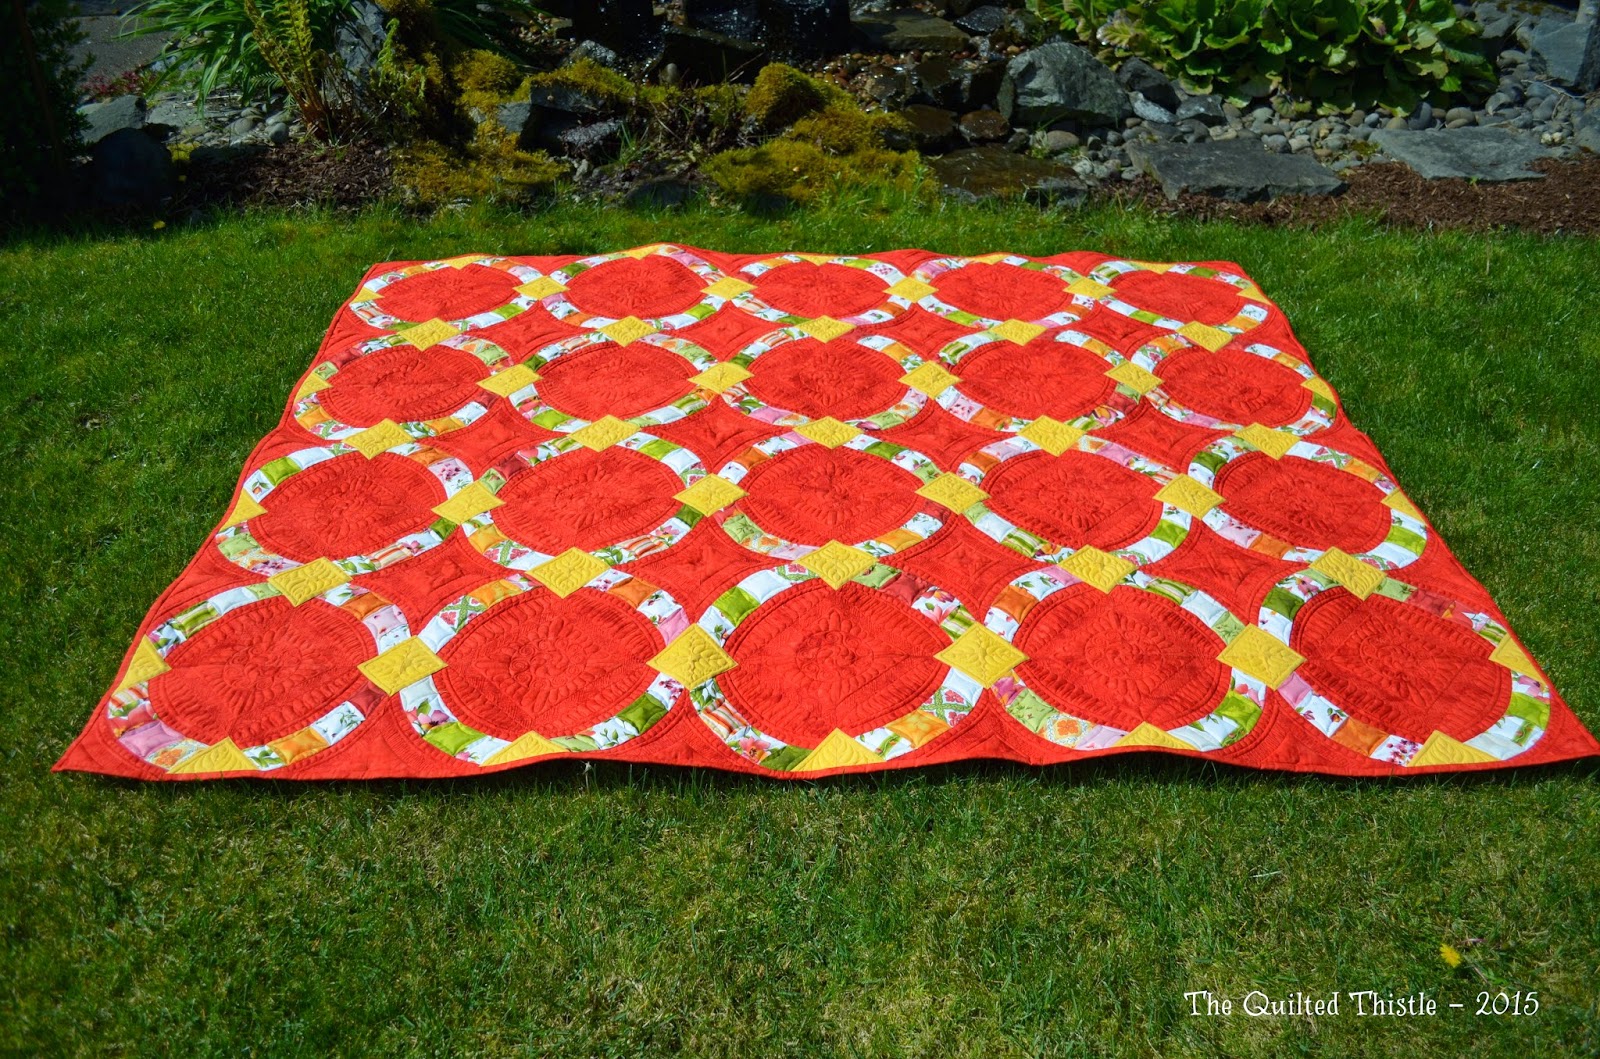
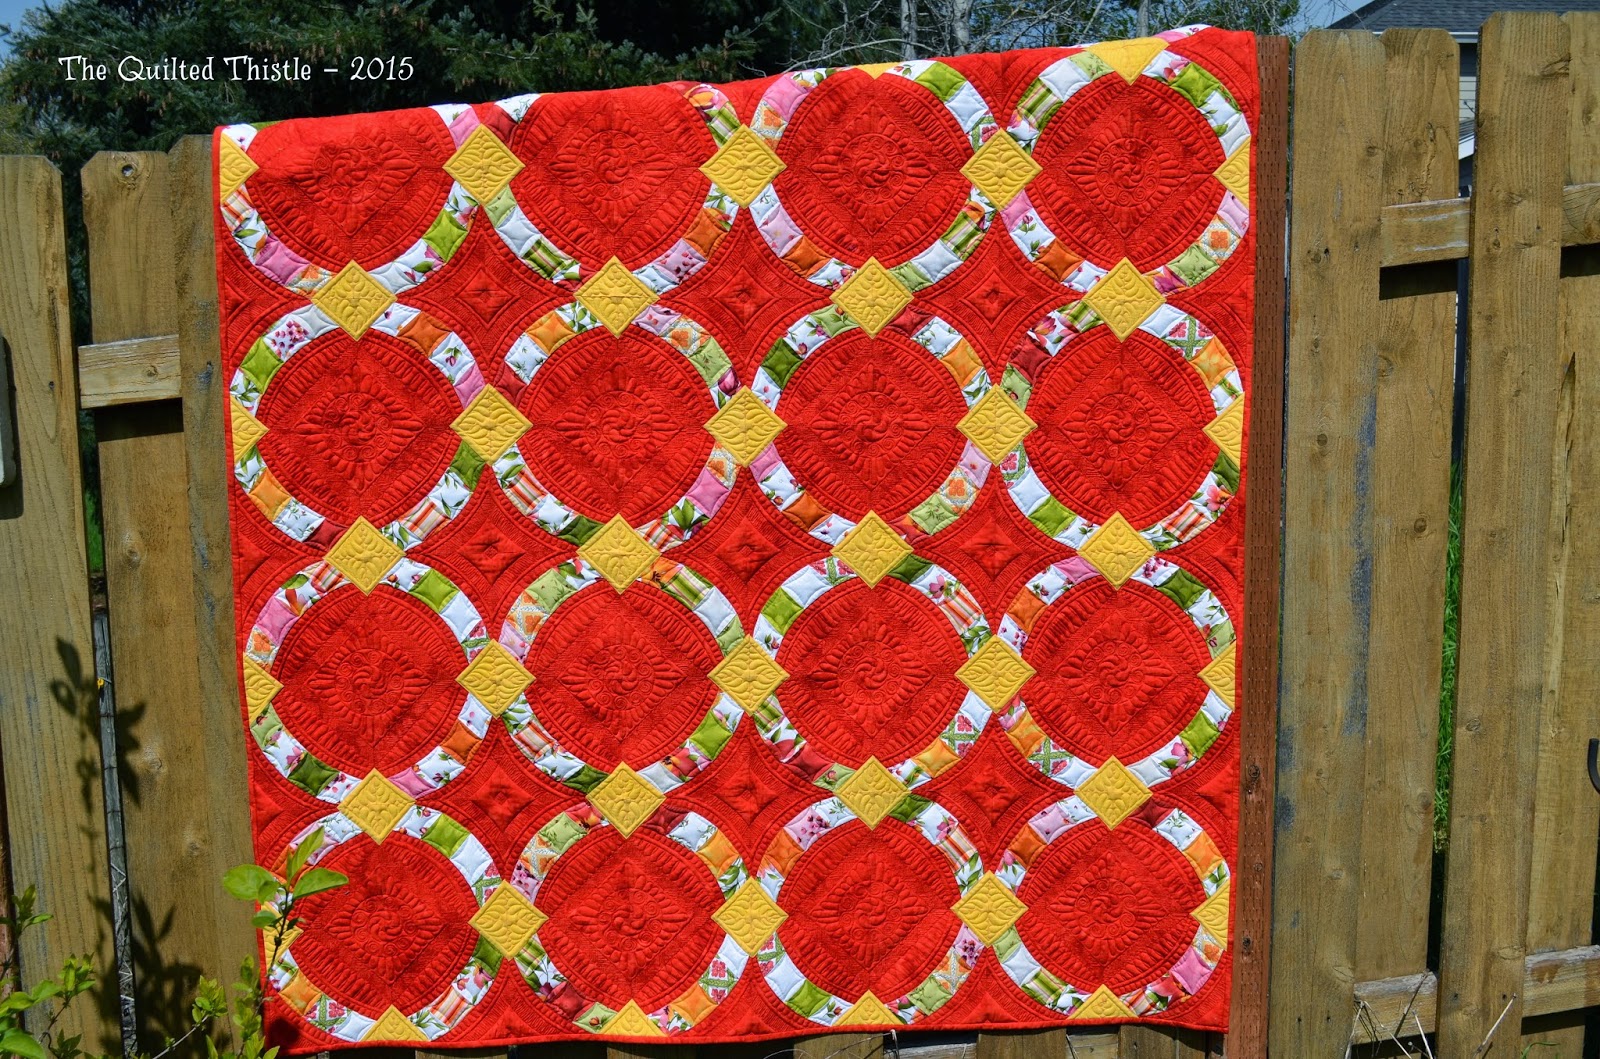
This quilt came into being because I had placed myself on a fabric buying moratorium. I know I say this quite frequently then come home with more fabric. But this time, I decided I had to follow through and just make something. I had jelly rolls, layer cakes, fat quarter bundles, and all kinds of yardage just growing in piles around my studio over the past few months. I had even convinced myself I needed that bolt of bright red batik last time I went on a batting run to EE Schenks. That’s right, I said bolt. That’s a lot of bright red batik. Of course I realized this after I had gotten it home. And added it to the stash. And suddenly the idea of the red quilt was born out of a necessity to use up that red batik.
In addition to buying a bolt of bright red batik, I have also come to love using the Quick Curve Ruler by Sew Kind of Wonderful since making a cheerful table runner for my mom’s birthday. I had so much fun, that I bought several more patterns (yes, I also have a pattern stash.) For some reason, once I made the decision to forge ahead with the red batik, I could just see a red Metro Hoops quilt. After that, it all just fell together. Another trip to my stash led me to a roll of 2 1/2 inch strips in Maywood Studio’s Catalina collection full of prints in red, orange, green and pink. I wasn’t sure what color to make the triangles, but within the options I had, I settled on this bright yellow. I really could have chosen any of the beautiful Kona solids that I pulled out to audition, but my husband really likes the color yellow. So, after seeing how it played with the Catalina fabrics, it was time to make a test block.

I was pleased with the result. It was definitely going to be bright! All that red batik was going to give me a great amount of negative space to fill with beautiful quilting. My goal is to enhance the quilt and make people want to draw closer and see the details. To do this, I knew this project was going to take longer than any I had undertaken to date.
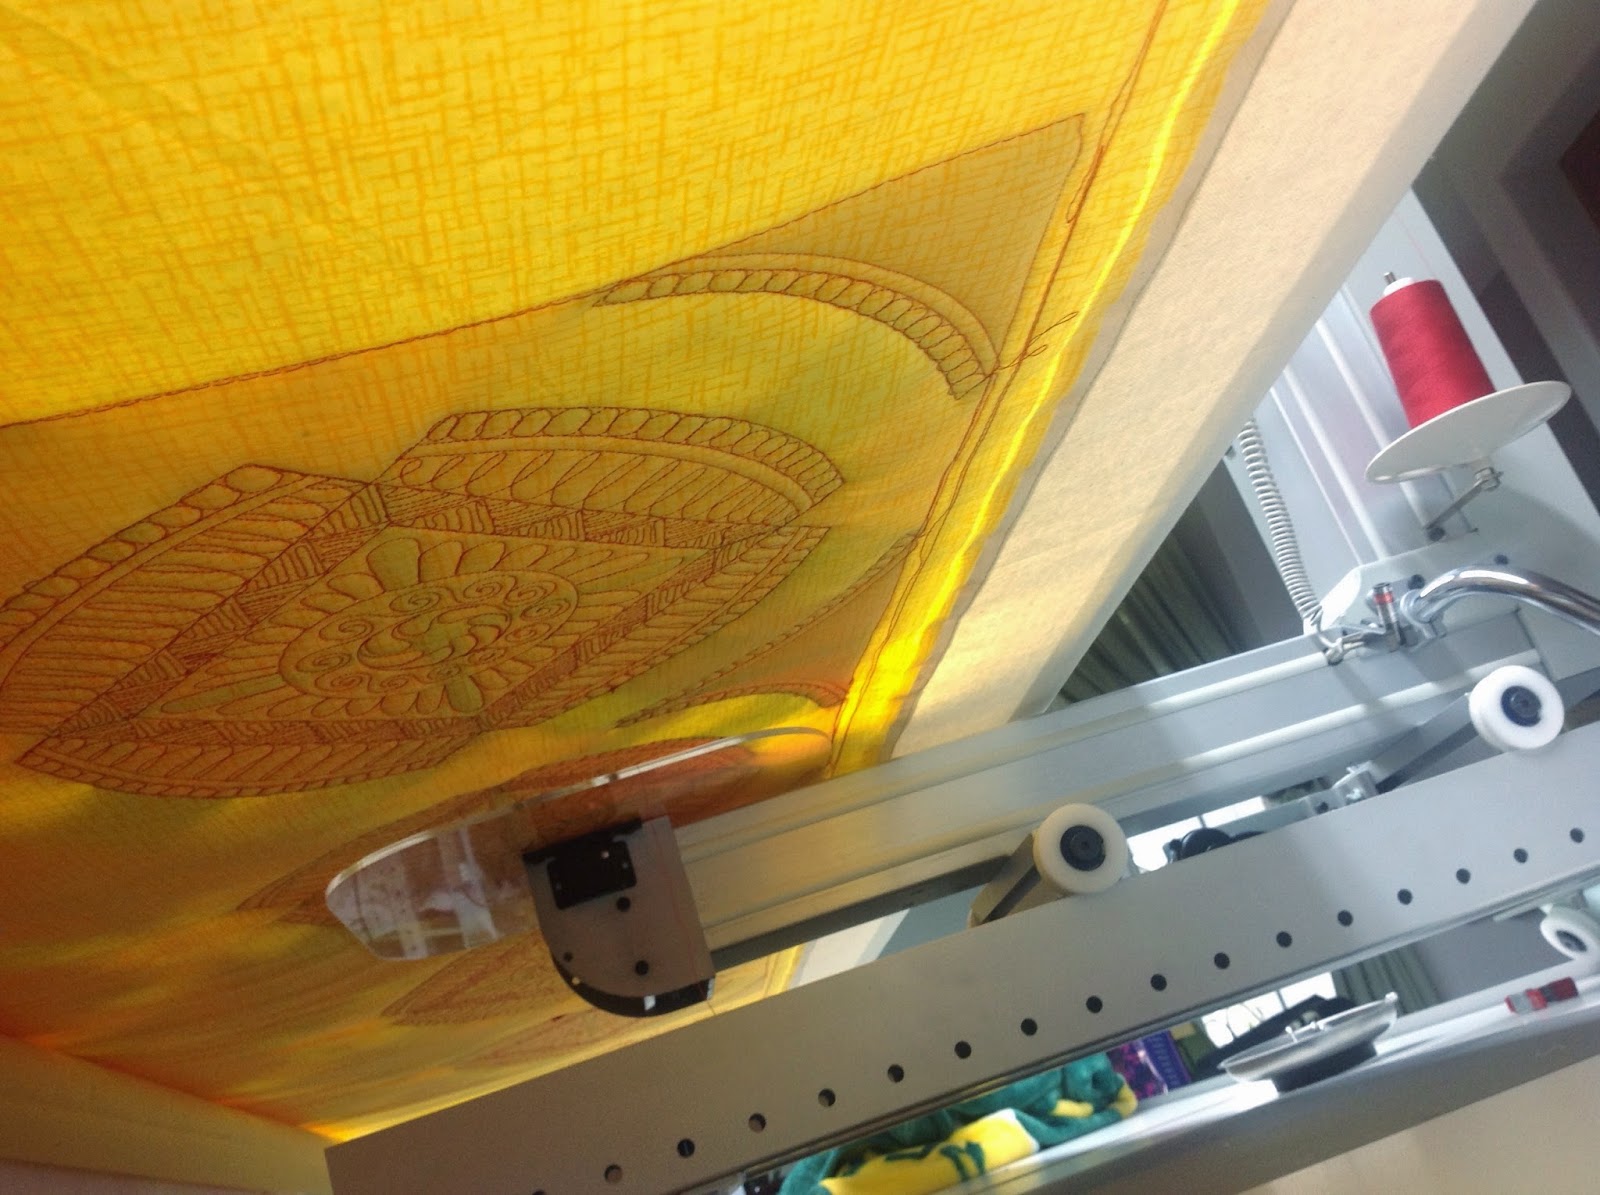
Whenever I quilt one of my own projects, I try to push myself to do a new technique and learn as much as I can. After saving up for months, I recently purchased a variety of longarm rulers and templates from Quilter’s Apothecary. For those of us who quilt without computerized assistance, these types of tools give us a way to quilt perfect circles and nice evenly spaced lines. I did not want my maiden voyage with them to be on a client’s quilt, however, so this would be a great opportunity to try them out on my own quilt.

I also knew I wanted to incorporate feathers into my quilting design. I’ve just started quilting feathers, and have ascertained from reading articles and watching videos that feathers are apparently difficult. Feathers are also very popular – and when done well – are a beautiful addition to quilting designs. So I’ve been practicing in my sketch book, and feel that I’m ready to tackle freemotion feathers.
So with circles and feathers in mind, my next step was to audition threads and quilting motifs. I’m sure glad I made a sample block that I could load up on the frame and experiment on.

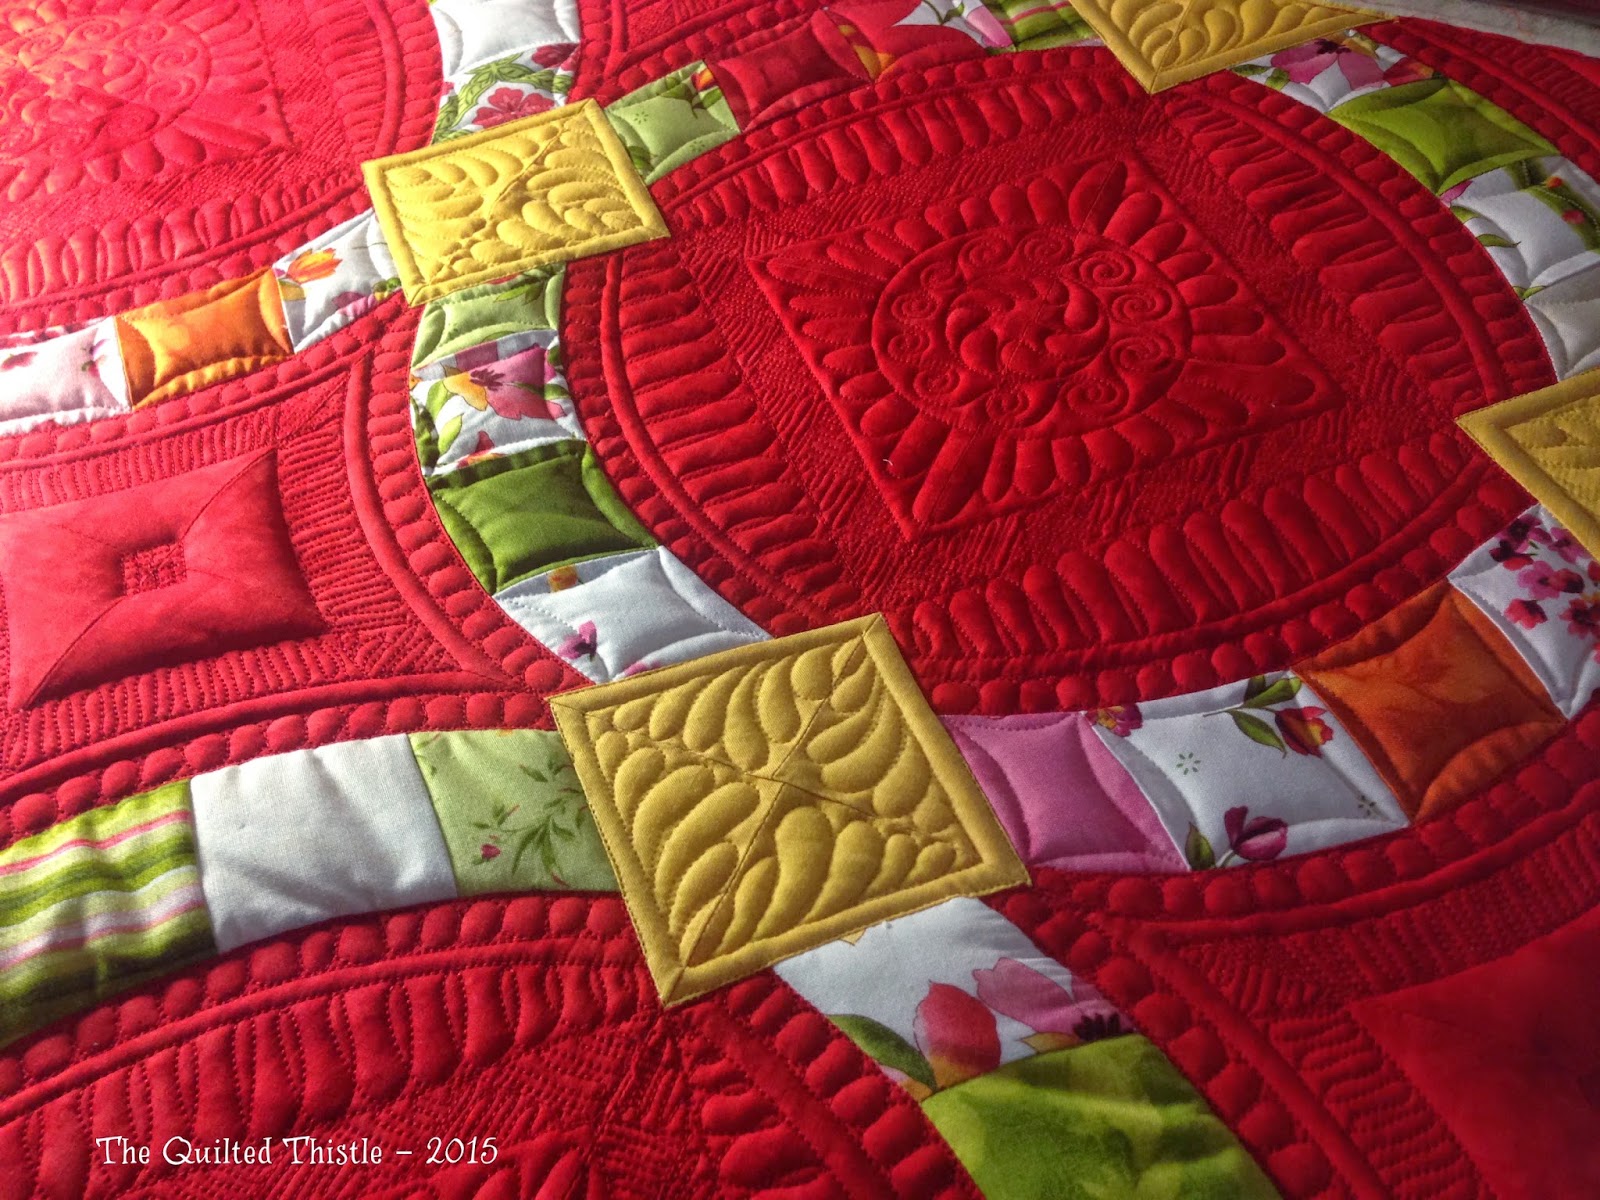
Since the Metro Hoops do not form a perfectly rounded circle, I was challenged to adapt the design to include perfectly round shapes. That’s when I thought of changing the shape to a square before filling the center with a couple of concentric circles. This was my first big project using my new Quilter’s Apothecary Longarm Rulers, and I am in love with them! The handles on the circles are great for increased control, and The Mystical 45 Ruler made quilting the square border of triangles possible without marking the quilt.
After finishing the sample block, I realized just how beneficial quilting a sample piece can be in refining the quilting design. Once I had finished the sample, I realized I wanted a bit more definition between the motifs, so on the actual quilt, I modified the design to include narrow unquilted bands to help define the string of pearls. I also decided to change the center motif from a four petal flower to feathers. The petals were quilted in such a way that it seemed almost flat – which I wanted to improve. I had settled on feather motifs in the yellow squares/triangles, so I decided to quilt the center circle with feathers. I really like repeating design elements when quilting. Its speaks to intentionality and forethought.

Isn’t the texture wonderful? I used two layers of batting – a layer of wool over a layer of cotton batting. It was quite a treat to quilt!
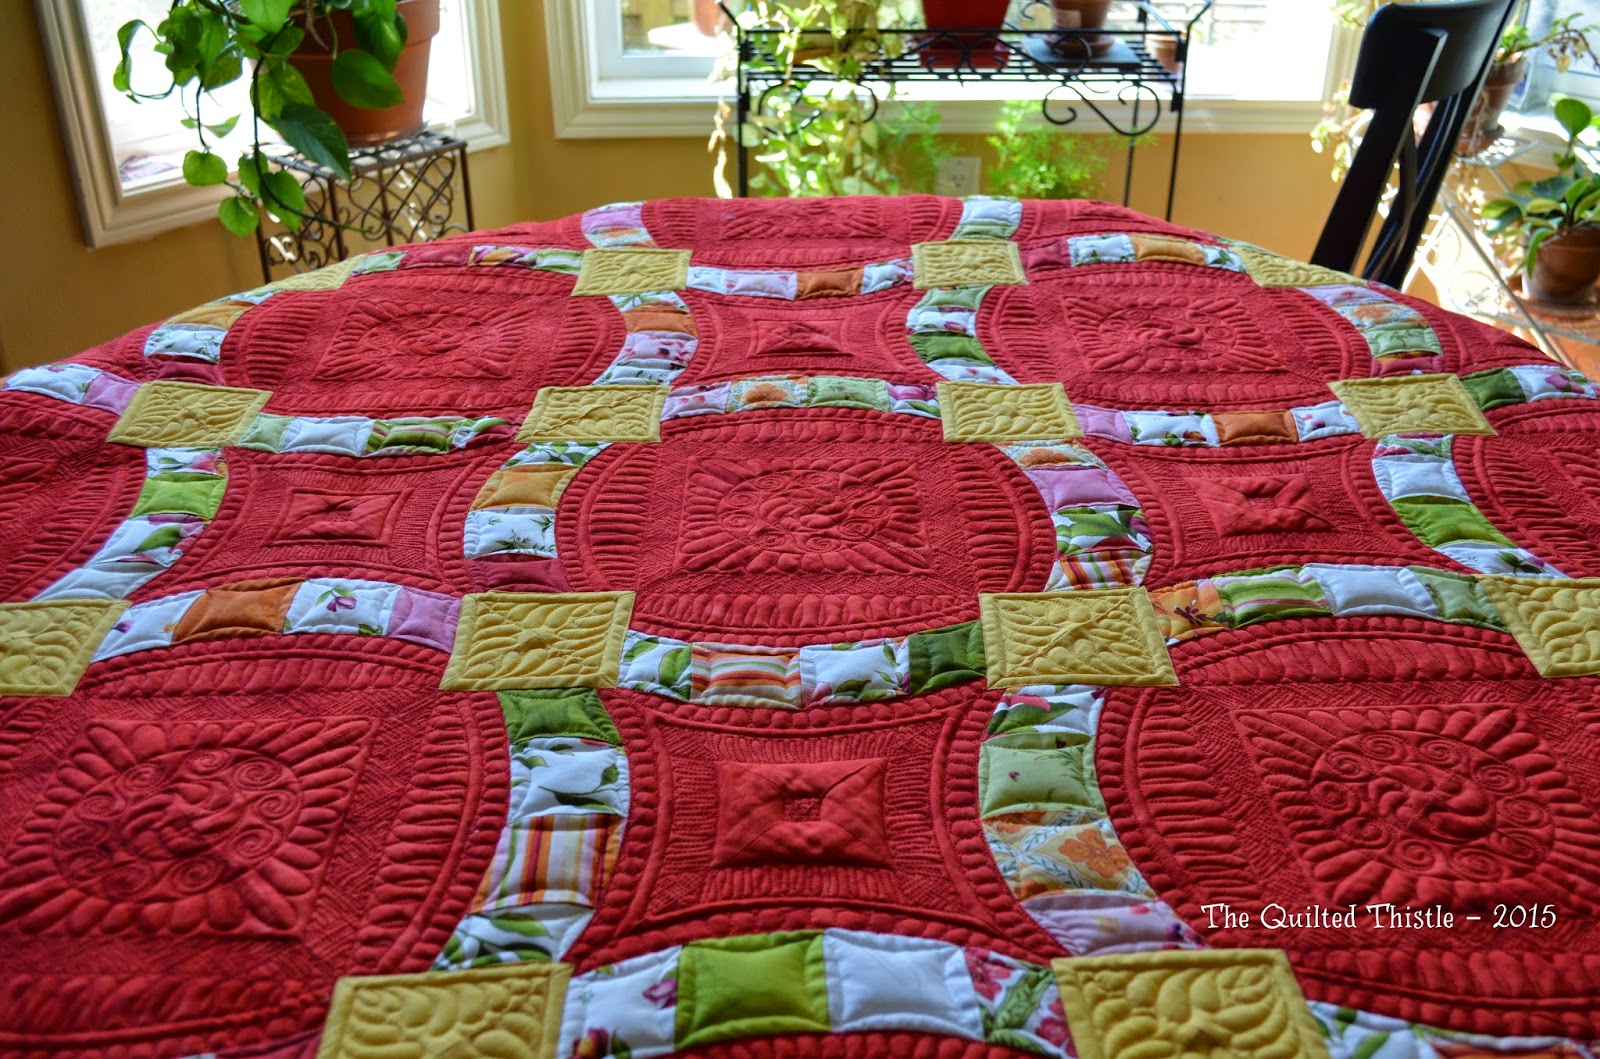
I love how the natural light shines into our dining nook, so I always try to get a picture on our table. I just love how the yellow in the quilt visually connects with the ochre walls – and the red is the same color as our kitchen island lights.

The finished quilt measures 60 x 90 and is perfect to wrap up in. My next task will be attaching a hanging sleeve to to the back. (Note to self for next time: Remember to machine attach hanging sleeve when sewing on the front half of the binding to reduce hand sewing time.)

This quilt took me over 30 hours to quilt – and helped me use up some of my stash. On both counts I’m proud of my accomplishments. I’ll be honest and tell you that I’m looking forward to quilting some simpler designs for a while, but I’m already thinking about what my next challenge quilting project will be. After all, I’ve still got several more QCR patterns and fabrics waiting in my stash, and I really want to quilt bigger circles!

Gorgeous Coleen!
LikeLike
Thank you, Diana! Your quilt inspired me to choose this pattern. Thanks for turning me on to the QCR!
LikeLike
Your quilt turned out amazing! I love it.
LikeLike
Oh wow!! That's absolutely gorgeous! Love everything about it and your quilting is amazing!
LikeLike
The quilt and quilting are beautiful. Such a good idea to do a sample block.
LikeLike
This quilt is spectacular!! Congratulations on a beautiful finish. I can certainly relate to the joy of using up your stashed patterns and fabrics, I'm going through the same process myself!
LikeLike
Amazing! So glad to have discovered you on Pat Sloan's show. Makes me want to go and practice on my long arm!
LikeLike